Okta SAML
Overview
Bold Penguin supports a wide variety of SAML 2.0 and OAuth 2.0 identity providers for SSO into the Bold Penguin Terminal.
This is specific documentation for creating a SAML 2.0 SSO link between Okta Single Sign-On and the Terminal. Additional information regarding Okta Single Sign-On is available at the end of this document.
In this document you will:
- Create the Okta applications necessary for the connection
- Configure the required SSO (Single Sign On) link for authentication
- Configure user attributes
- Map roles to users to connect your environment to Bold Penguin
Create Applications
You will create two new applications in the Okta Admin Console for the Bold Penguin beta and production environments.
In the Admin Console, go to Applications > Applications
Click Add Application
Click Create App Integration to start the Application Integration Wizard
Select SAML 2.0 for the Sign on method
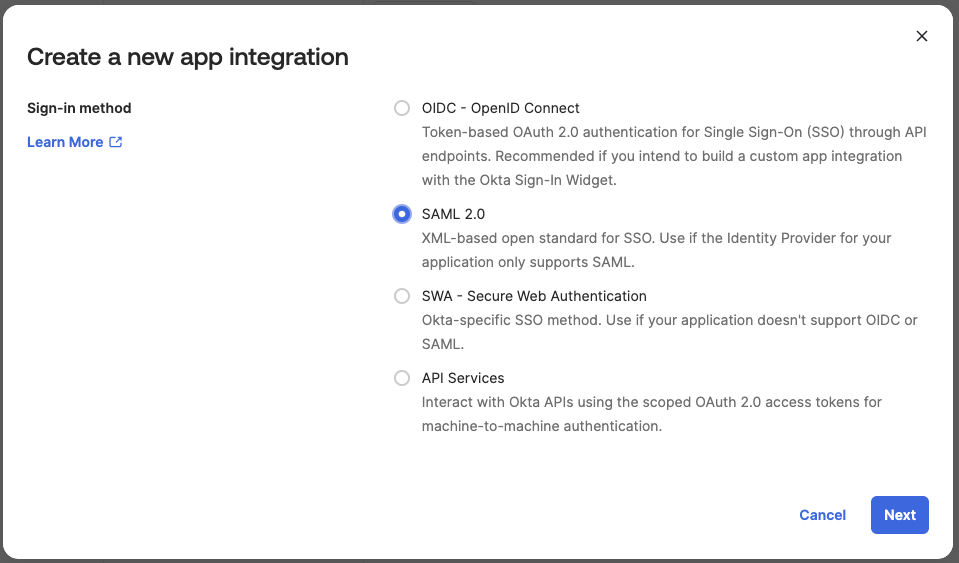
Click Next
Enter a name for your integration and check the boxes to not display the application icon to users. Bold Penguin currently doesn't support IDP initiated SSO, if users were to use these buttons, login would fail.
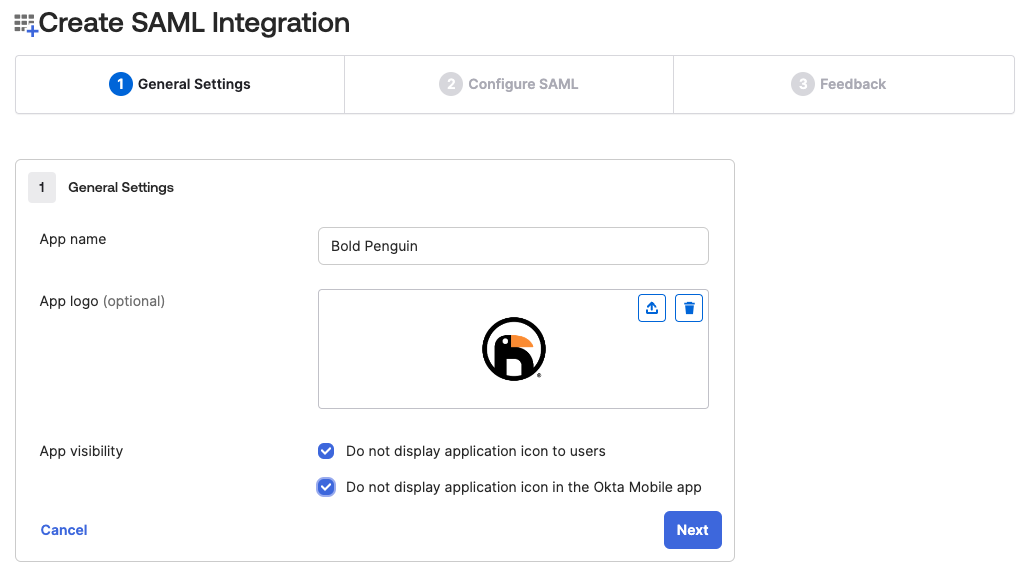
Optional app logo available here: Download logo
Click Next to switch to the SAML Settings tab

Use the table below to set the appropriate values for Single sign on URL and Audience URI (SP Entity ID) for each environment
Production
Single sign on URL
https://boldpenguin-auth.boldpenguin.com/users/auth/saml/callbackAudience URI
https://boldpenguin-auth.boldpenguin.com
Beta
Single sign on URL
https://boldpenguin-auth-uat.beta.boldpenguin.com/users/auth/saml/callbackAudience URI
https://boldpenguin-auth-uat.beta.boldpenguin.com
Leave Default RelayState blank
Set the Name ID format to
EmailAddressSet the Application username to
EmailYour claim needs the following minimum set of attributes:
URI Reference Value http://schemas.xmlsoap.org/ws/2005/05/identity/claims/givenname user.firstNamehttp://schemas.xmlsoap.org/ws/2005/05/identity/claims/surname user.lastNamehttp://schemas.xmlsoap.org/ws/2005/05/identity/claims/emailaddress toLowerCase(user.email)http://schemas.microsoft.com/ws/2008/06/identity/claims/role appuser.role Note: The
appuser.rolevalue will not work unless the steps in Configure Roles below are completed.Click Next
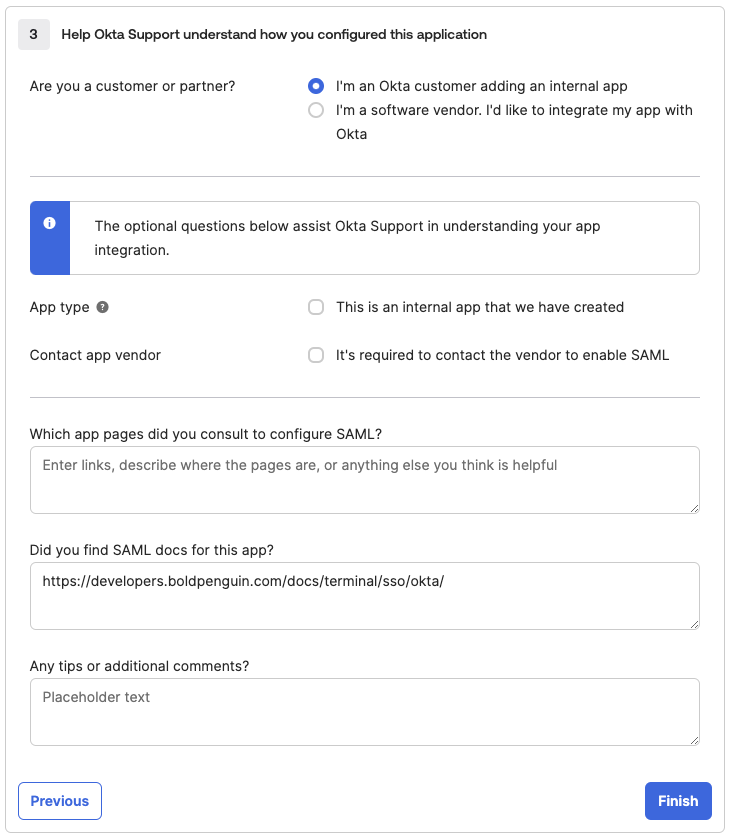
Optionally fill out details to help Okta Suppport then click Finish
From the Sign On tab of the newly created app Copy the Metadata URL from the SAML 2.0 Metadata details section.
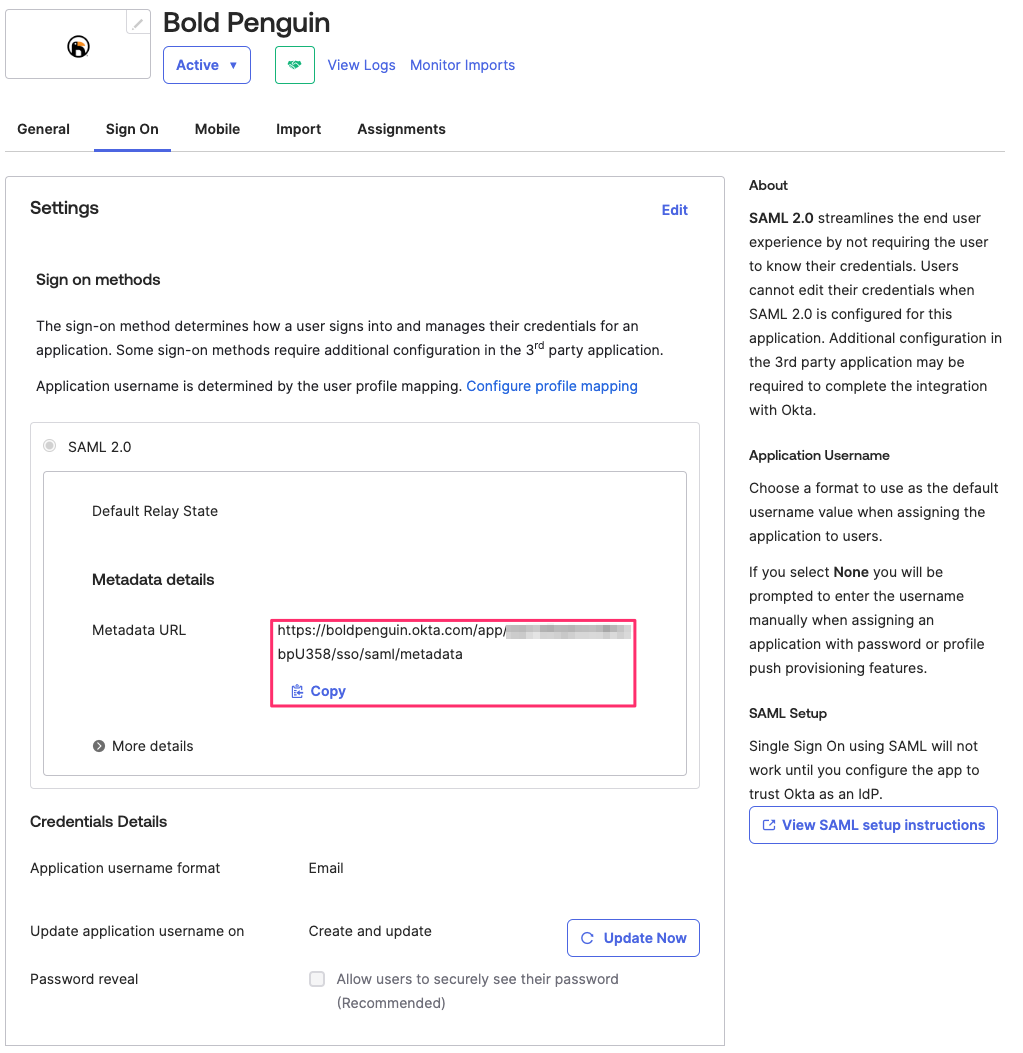
Email the metadata URL copied above to your Bold Penguin Project Manager
Configure Roles
Navigate to the Directory > Profile Editor page
Locate and select the Profile for the newly created application. It should have match the patter
[ApplicationName] User.
Select Add Attribute
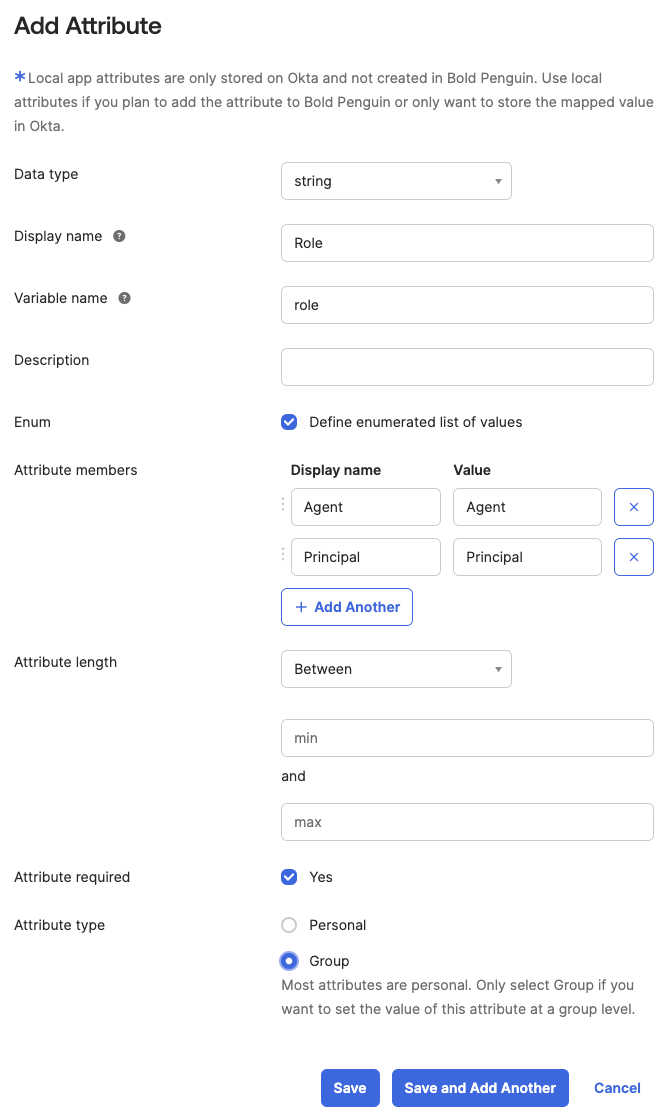
Set the Display name to
RoleSet the Variable name to
roleSelect Define enumerated list of values
Add the
AgentandPrincipalattribute members as displayed above.Check Yes to require the attribute
Select Group for Attribute type
Click Save
Assign Users and Roles
Before a user can login they must be assigned to the application and a Role. These roles and permissions will be defined by you and your Project Manager based on our role recommendations.
To assign your integration to users in your org:
Click the Assignments tab in your application.
Click Assign and then select either Assign to People or Assign to Groups.
Enter the appropriate people or groups that you want to have Single Sign-On into your application, and then click Assign for each.
Select a Role from the dropdown.
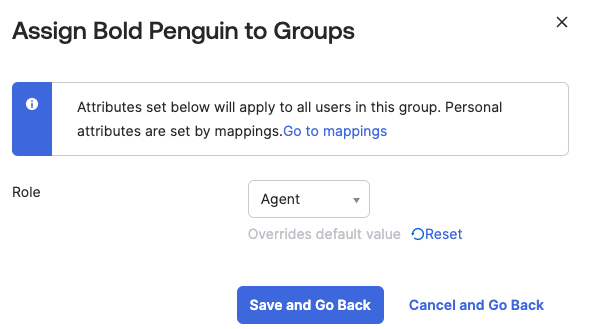
For any people that you add, verify the user-specific attributes, and then select Save and Go Back.
Click Done.
Testing
Your Project Manager will confirm receipt of the metadata URLs from your applications above. Once we add these to your tenant, you should be able to login to the Bold Penguin Enterprise Terminal using the dashboard URL for your domain:
https://terminal.boldpenguin.com
When your users first authenticate into Okta, Bold Penguin receives the roles you mapped above in our authentication layer.
Next, you will work with your project manager to add the appropriate permissions for each role or group.
Useful Okta resources
What is SAML: https://developer.okta.com/docs/concepts/saml/
Create SAML app integrations: https://help.okta.com/en-us/content/topics/apps/apps_app_integration_wizard_saml.htm