Azure SAML
Overview
Bold Penguin supports a wide variety of SAML 2.0 and OAuth 2.0 identity providers for SSO into the Bold Penguin Terminal.
This is specific documentation for creating a SAML 2.0 SSO link between Microsoft Azure AD and the Terminal. Additional information regarding Microsoft Azure AD is available at the end of this document.
In this document you will:
- Create the Azure applications necessary for the connection
- Configure the required SSO (Single Sign On) link for authentication
- Configure user attributes
- Map roles to users to connect your environment to Bold Penguin
Create Applications
You will create two new applications in the Azure Portal for the Bold Penguin beta and production environments.
From the Azure Portal side navigation select Enterprise applications
Click the button for New application

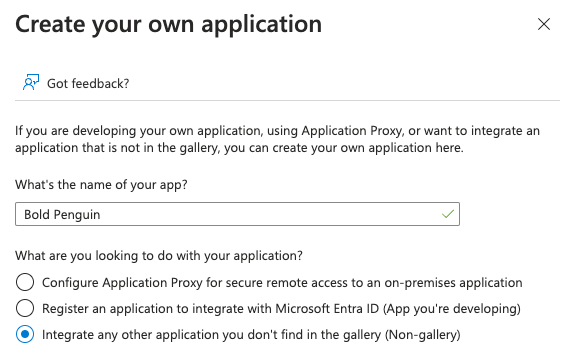
Select Create your own application

Enter a name for the application and ensure Non-gallery is seleceted, then click the Create button
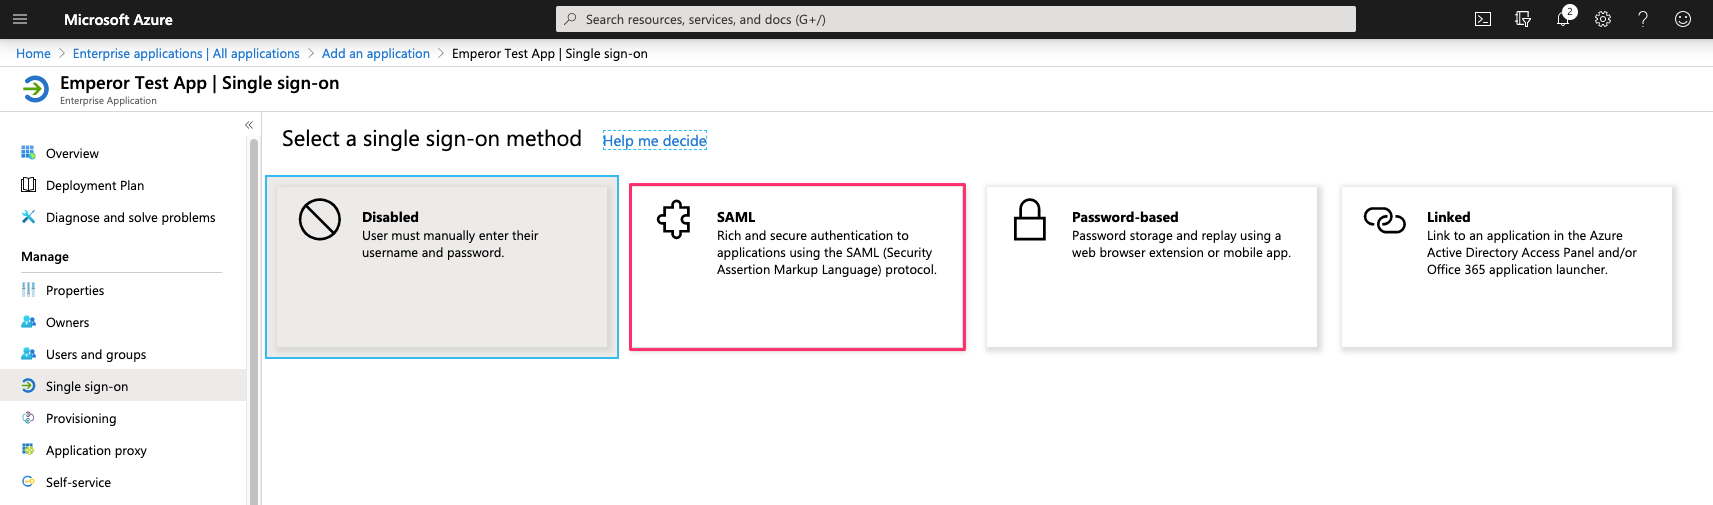
Select Single sign-on from the navigation side bar
Select SAML
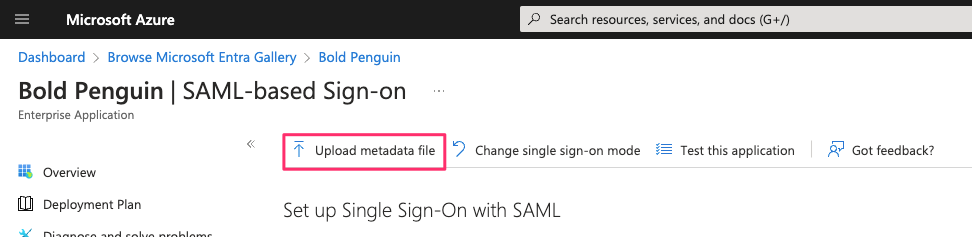
Download the metadata file below for the appropirate environment.
Select Upload metadata file and upload the appropriate file from the previous step.
Ensure the following values are prefilled correctly from the uploaded metadata
Production
Identifier
https://boldpenguin-auth.boldpenguin.comReply URL
https://boldpenguin-auth.boldpenguin.com/users/auth/saml/callback
Beta
Identifier
https://boldpenguin-auth-uat.beta.boldpenguin.comReply URL
https://boldpenguin-auth-uat.beta.boldpenguin.com/users/auth/saml/callback
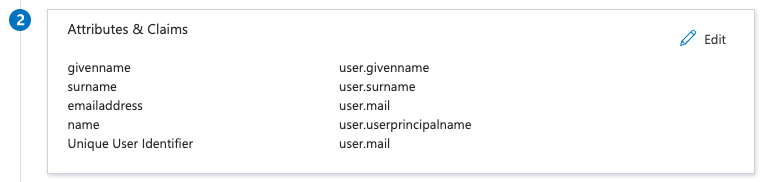
In the upper right corner, select the pencil icon to edit the configuration for section 2, User Attributes & Claims

In section 2, User Attributes & Claims click on the row for Unique User Identifier (Name ID) to edit
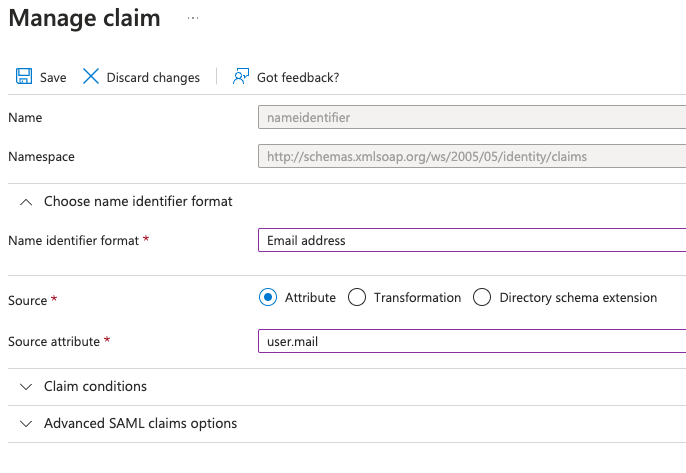
- For Choose name identifier format select
Email address - For Source attribute select
user.mail - Click Save
- For Choose name identifier format select
Verify User Attributes & Claims matches the following:
In section 3, SAML Signing Certificate locate the App Federation Metadata Url and click the copy button on the far right

Email the metadata URL from above step to your Bold Penguin Project Manager
After completing the beta application, repeat these steps for production.
Create Roles
You will create one or more roles in Azure AD that will map to roles within the Bold Penguin Enterprise Terminal. Typically, the only predefined role in Azure AD is User. For testing in the beta application, you must make some modifications to the User role.
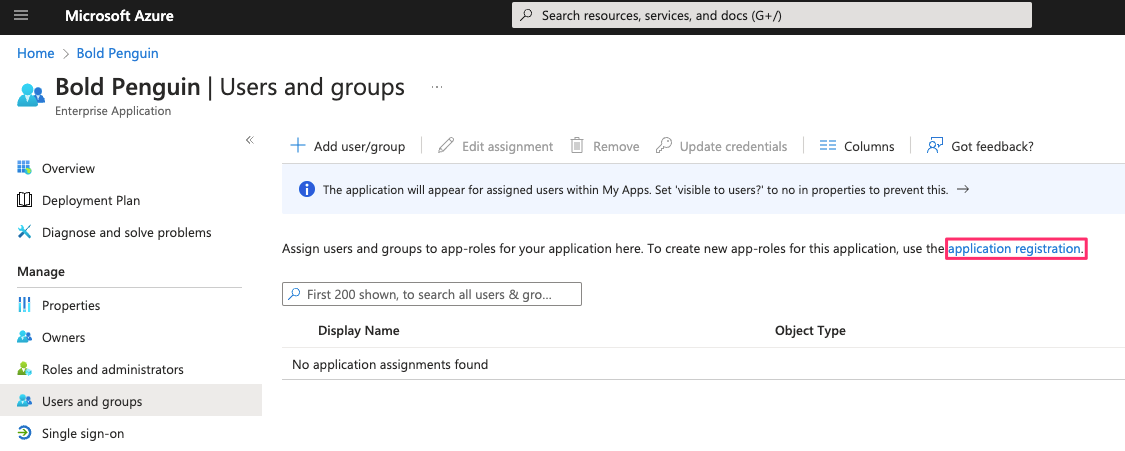
From the Users and groups tab select application registration
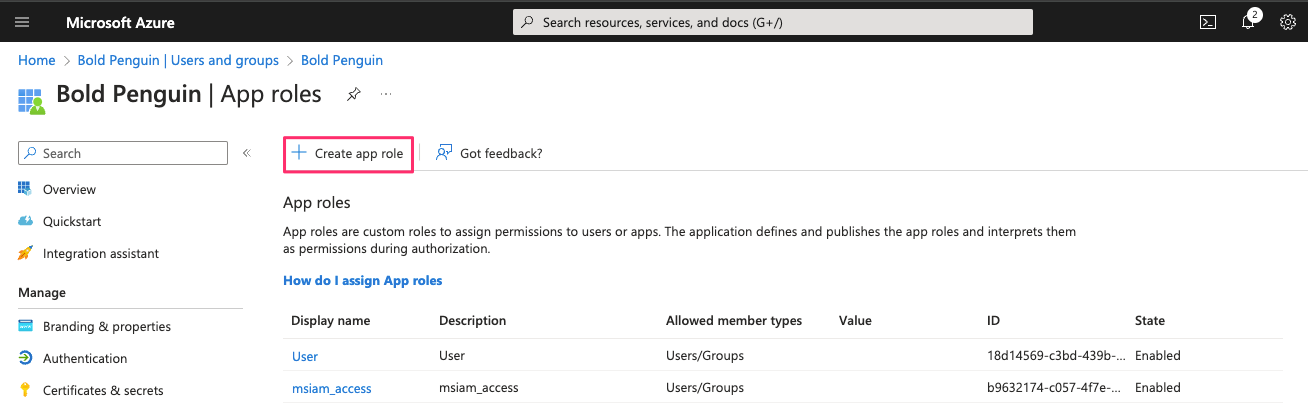
Select Create app role
Fill in all the fields with
Agentand selectUsers/Groupsfor allowed member types.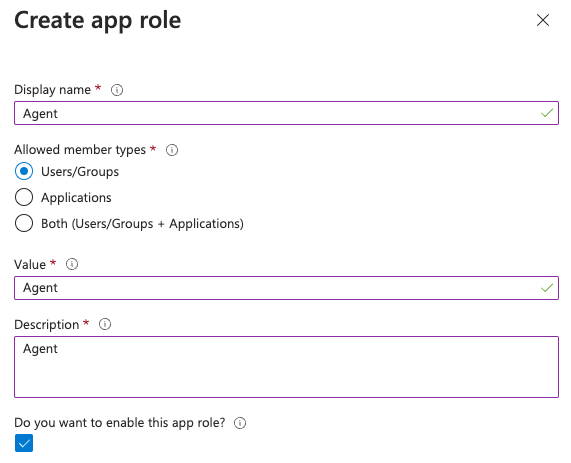
Repeat the previous step for the
Principalrole.Disable then delete the built-in
Userrole. You should now have the following roles available.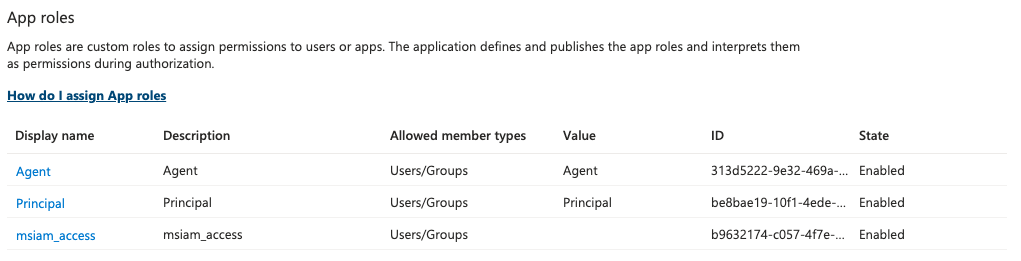
Assign Roles
You must assign our User role (or other predefined roles) to one or more Azure AD users.
From the Azure Portal side navigation select Enterprise applications
Locate and select your application
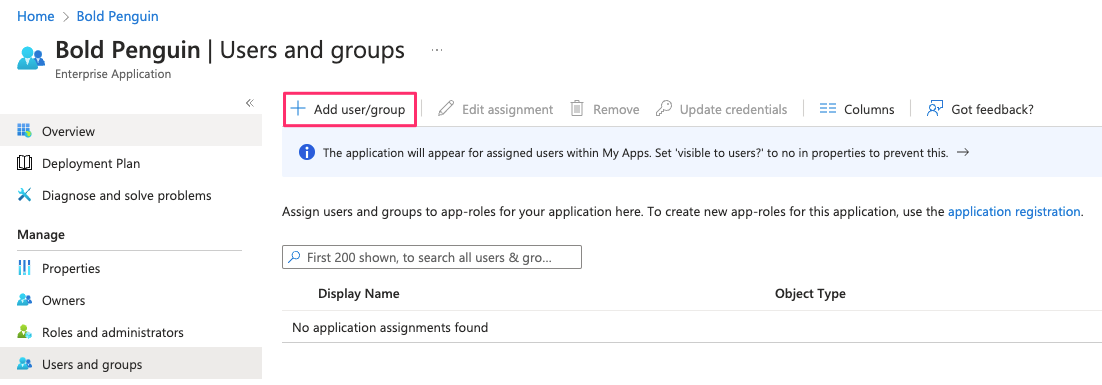
From the side navigation select Users and groups
Click Add user/group
Click Users and groups to bring up the search panel
From the search panel select an existing user or group
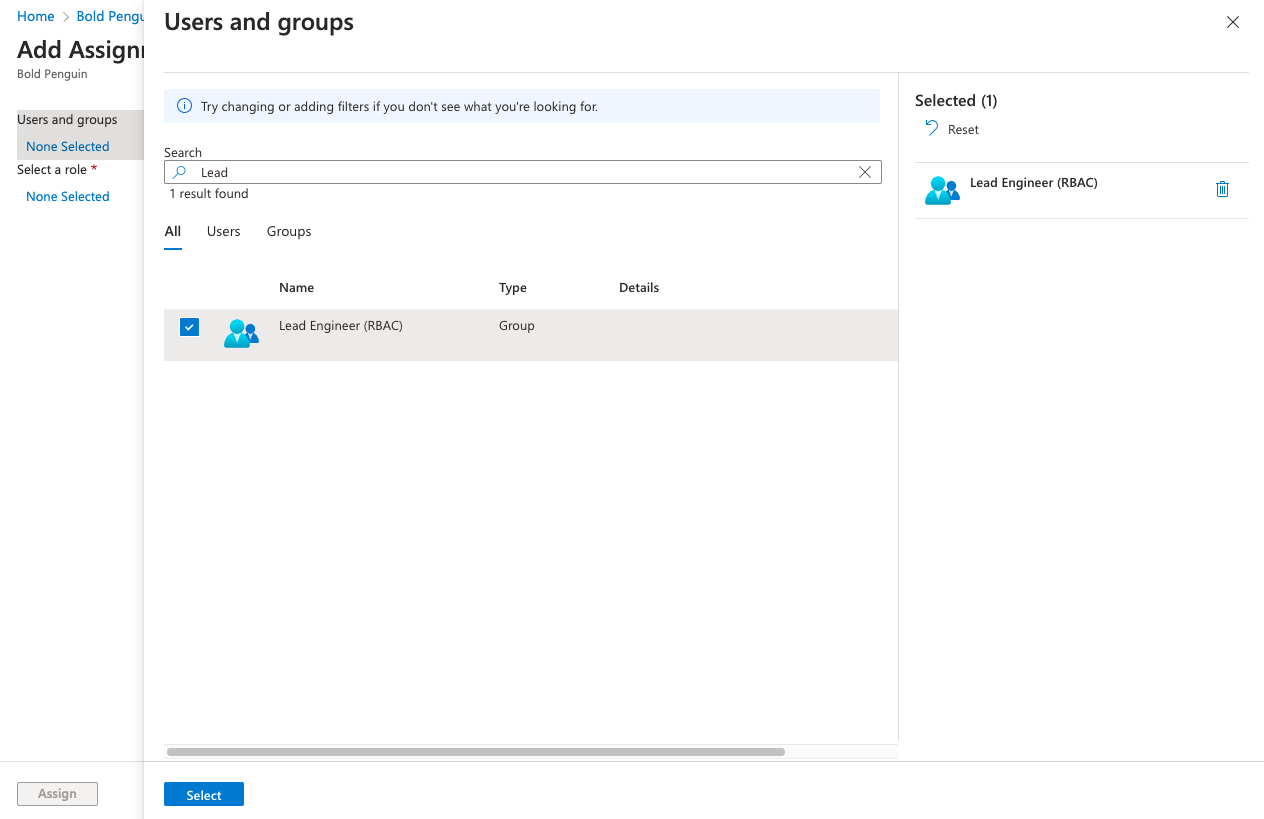
Click Select
Select Role and assign either the Agent or Principal role.
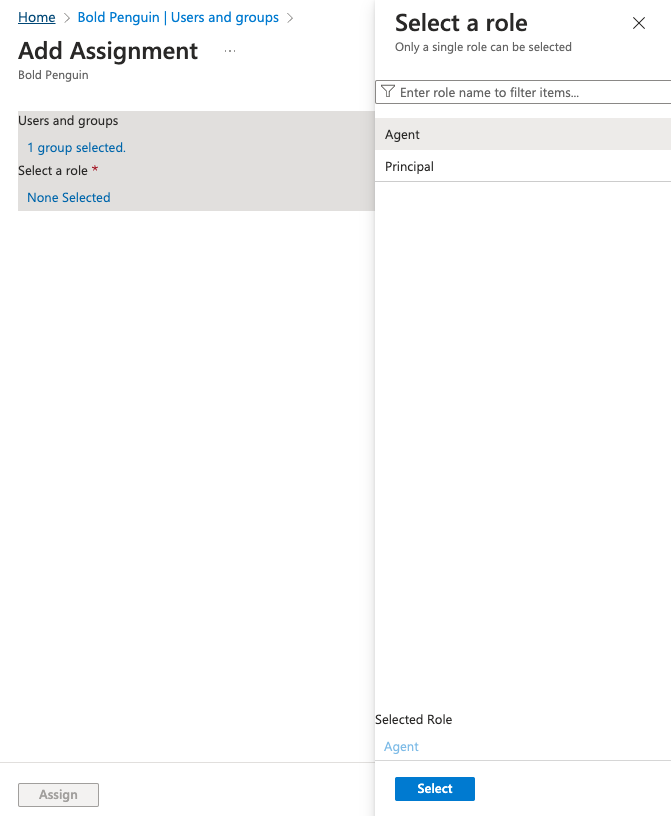
Click Assign to create the assignemnt
Testing
Your Project Manager will confirm receipt of the metadata URL above. You should now be able to login to the Bold Penguin Enterprise Terminal using the dashboard URL for your domain:
https://terminal.boldpenguin.com
When your users first authenticate into Azure, Bold Penguin receives the roles you mapped above in our authentication layer.
Next, you will work with your project manager to add the appropriate permissions for each role or group.